This page contains some of my UFO drawings of machines and Moonbase. They are in random order. I should really have dated each picture, but they are only drawn for fun. They are, however, copyright!
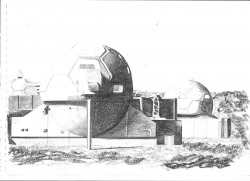
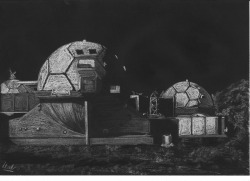
Moonbase in pencils

Moonbase. I was really pleased with this, as I expected it to be much harder to get the shading to look reasonable. When I had finished the actual drawing I was then faced with the problem of how to put in a black background. I tried using black graphitint pencil and then a wash over it, but it didn't work out as well as I had hoped.I have put up the different stages of the work as it progressed; I am most pleased with the finished drawing that hasn't had the background done! Oh well, back to the drawing board!
 |
Pictures below;
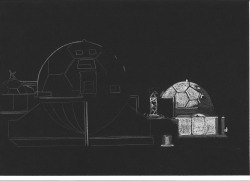
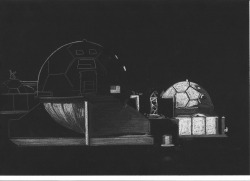
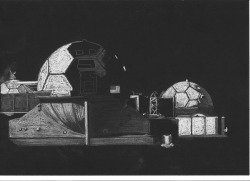
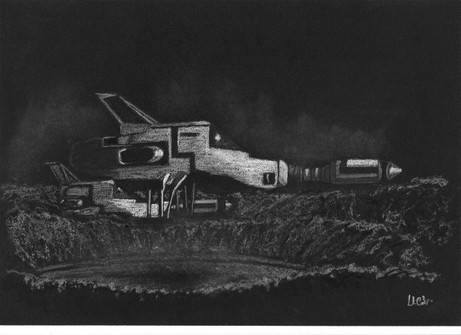
Moonbase - Again! I decided to try to do this picture again, only this time in white on a black background. I expected it to be harder than it actually was! The only real difficulty was that I didn't have enough soft pale pencils and had to rely on just four different ones.So, its back to the Art shop next week! I rather fancy trying this same technique for an Interceptor! |
 |
 |
 |
 |
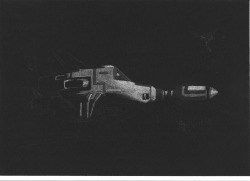
Launch Interceptors
 |
 |
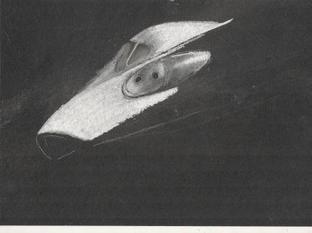
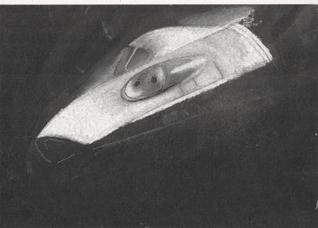
I started this picture by drawing out the outline of the interceptors and then used a white pastel pencil to do the brightest parts, gradually adding in the shading. The hardest part was trying to draw the craters! I haven't finished this picture - I need to put in the 'dust' which obscures the 'skids' of the lead Interceptor, but I think I may make a hash of it..if so, I won't put the last picture up... But that will have to wait anyway as I need to tidy up the mess I have made!
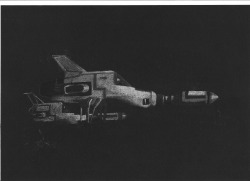
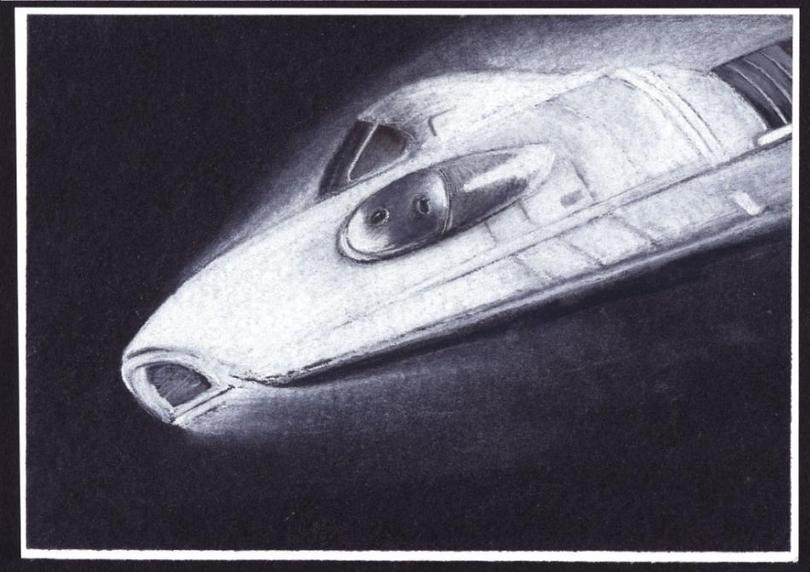
Interceptors Launch
Okay, finished at last. It went darker when I sprayed fixative on it ( I usually use Adas smartprice hair spray, but I had run out!), so I had to go over areas again. The shadow under the Interceptor and the dust make a big difference to the final version. Unfortunately I can still see the pencil lines which is a little annoying!, But, as with all the pictures, I enjoyed doing it. Which is the whole point really! I will probably get this picture out and make minor adjustments to it for some time as I can always see things that need improving or tweaking!
What I really need is someone to tell me when to leave a picture alone and stop fiddling with it!
What I really need is someone to tell me when to leave a picture alone and stop fiddling with it!
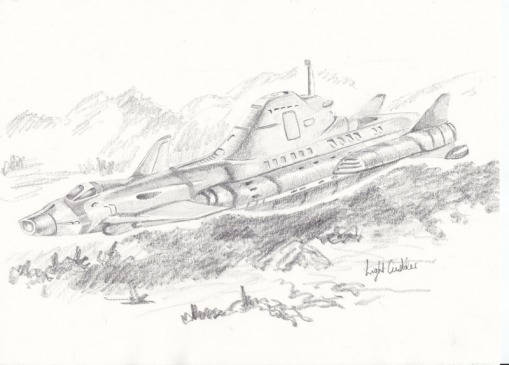
Shuttle: From Kill Straker!
I started this to show a pupil how I used chalks and pastels in my drawings.
I think that I should have done it on a smoother piece of black paper instead of A4 black card, which has a rough texture and therefore doesn't 'hold' the chalk as well as I would have liked. But, as with all my 'drawings' I do them for fun and my own pleasure. If you like them as well, that is fine, but they are very rough!
Media used:
Conte chalks (white and shades of grey)
Faber-Castell Pitt Pastels
Compressed Chalks, assorted 'stumps' for blending (And lots of putty rubbers!)Smart-Price hair spray!! ( cheapest fixative for chalks and pastels!)
I had to build up several layers of chalks etc to get the depth of colour but having got to this point I thought it was worth continuing with it.
I trimmed the picture and double mounted it because I wanted the 'whiteness' of the heat of 're-entry' to stand out, and the white frame helps to do that. I might try the same picture using coloured pastels which would be a very different challenge.
LtCdr
And below...... the final result.
I trimmed the picture and double mounted it because I wanted the 'whiteness' of the heat of 're-entry' to stand out, and the white frame helps to do that. I might try the same picture using coloured pastels which would be a very different challenge.
LtCdr
And below...... the final result.
I started this in pastels and then realised that it would be better in acrylics. So I had a go at it. Several layers and hours later...
I am quite pleased with the finished article. Its A4 size on card and I would really like to do it much larger when I have the time and inclination!
I am quite pleased with the finished article. Its A4 size on card and I would really like to do it much larger when I have the time and inclination!
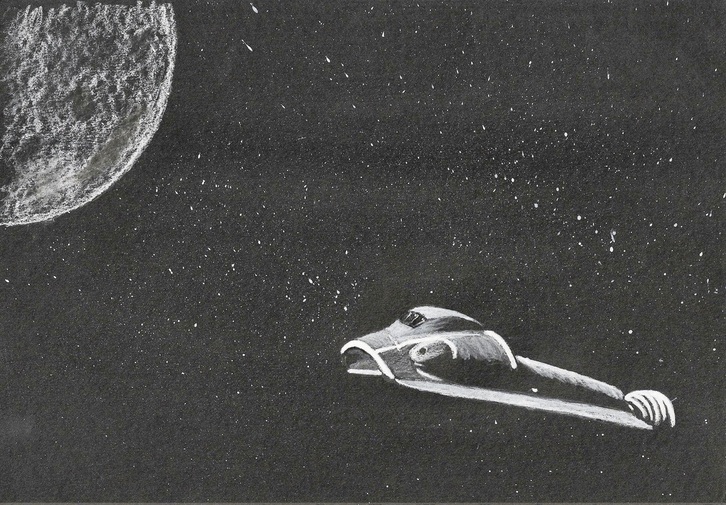
Lunar Shuttle approaching Moonbase (Episode;Close Up)
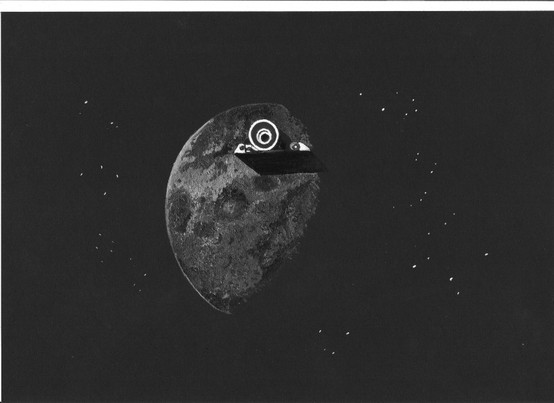
I did this first in pastels but it was very faint and although I was pleased with the surface of the Moon, the Lunar Shuttle was not well defined.So I got out the paints and tried again! Much clearer this time,and I could put the stars in on the background.
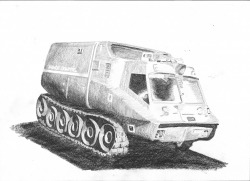
I wanted to try a mobile... and thought I'd do the hardest part first. The treads looked really difficult, and I didn't want to do the mobile and then make a hash of the treads... But they were actually the easiest part.
|
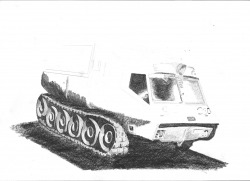
The front of the mobile was difficult as I only had a very blurry picture to work from, so I have probably missed out some details. The completed Mobile is below.
|
Football on TV. Too sunny to use the laptop to write. So; Mike Trim’s picture called! I started it in pastels and then realised that it would not work out. They are too thick for the fine detail I wanted to try to achieve so I changed to acrylics.
|
Working out okay, although its difficult painting in sunshine as the paint dries a little too quickly.The final picture is meant to go with The FarSight Trilogy, but I wasn’t thinking and put Earth in the background as Mike Trim has done. It doesn’t really matter though. The Earth in this picture is pretty rubbish, but on the whole I am pleased with the Moonmobile or Moonhoppper as Mike Trim calls it.
|
This was done in pastels with some acrylics. I was pleased with the way the surface of the moon worked out!
A4 black card.
Signed by the artist.
For sale. (laughing here!)
A4 black card.
Signed by the artist.
For sale. (laughing here!)

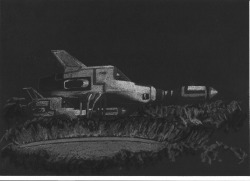
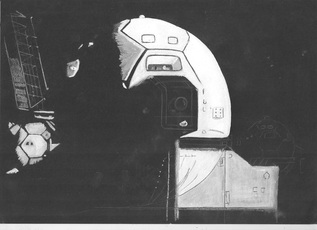
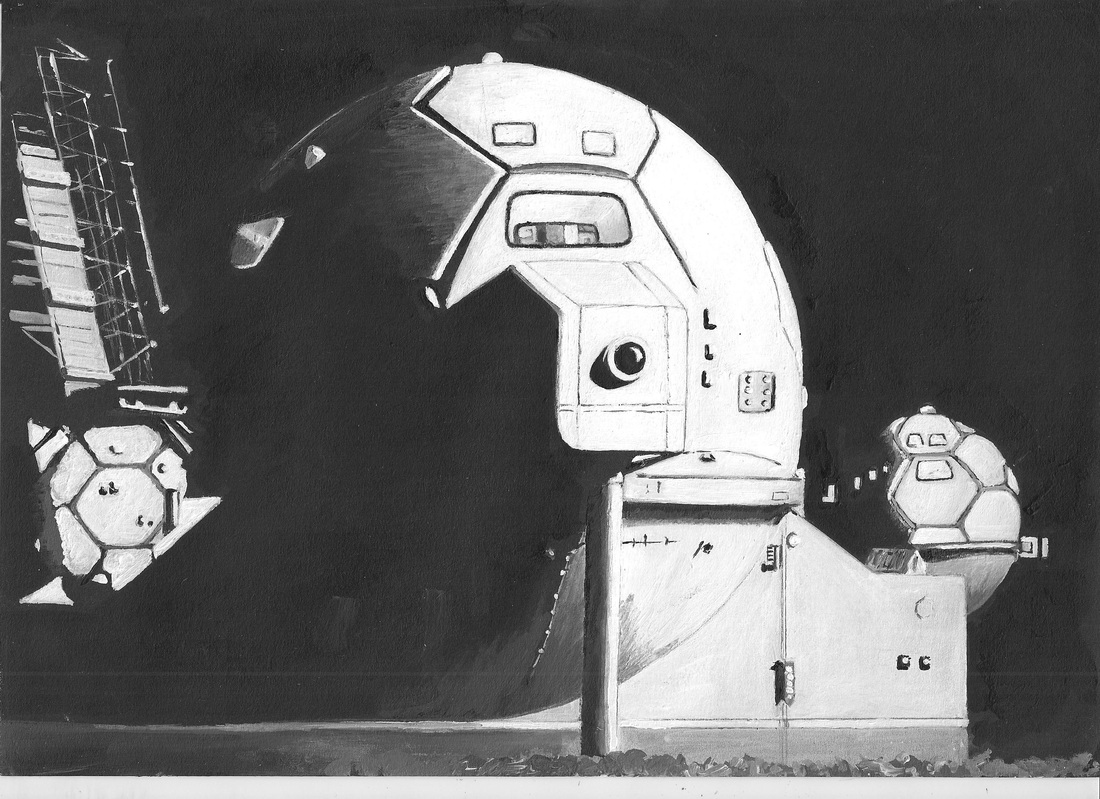
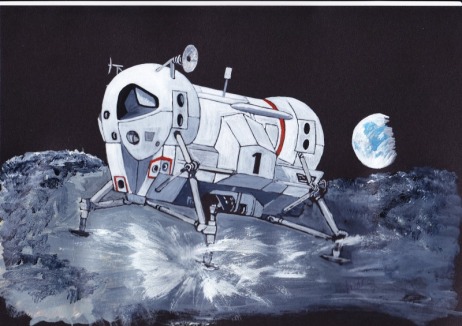
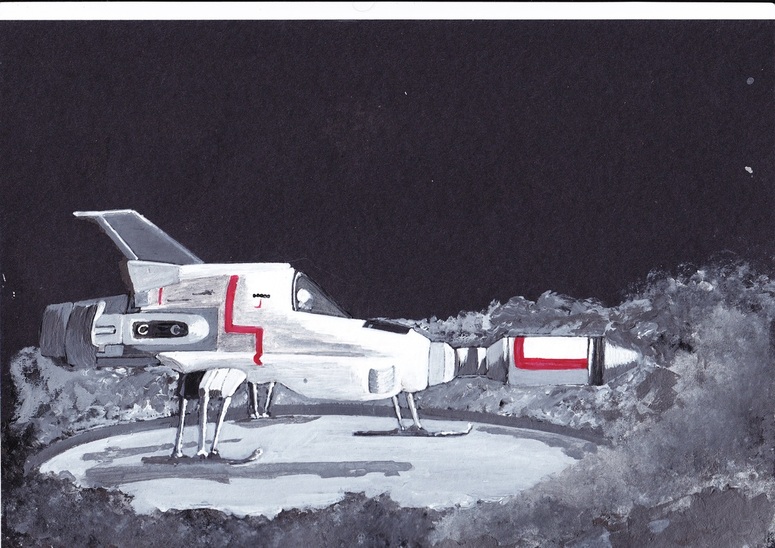
Well, I had the paints at work, so I thought I would continue with the Moonbase theme. This was much harder to do, because I didnt have a good
picture of an Interceptor from which to work. I took a scan of the picture when I had been working on it for a few hours, and then the finished picture. It's not one that I think I will keep though, as the moonscape is not very good, and the 'engine' section of the Interceptor is too vague and unformed |
|
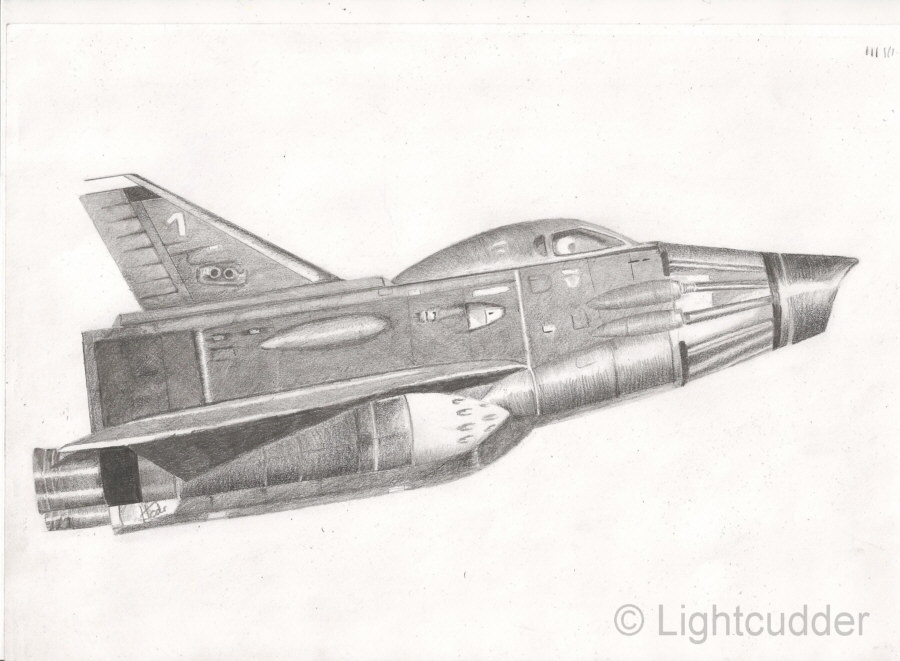
Skydiver in pencil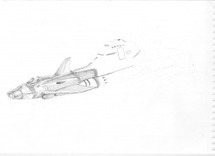
|
in the style of Meddings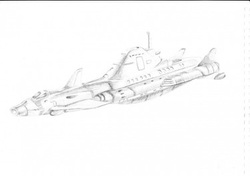
|
|
|
This is in pencil and took about 14 hours to do more or less.
|
|
